Why is the Firebase database becoming so popular among developers recently?
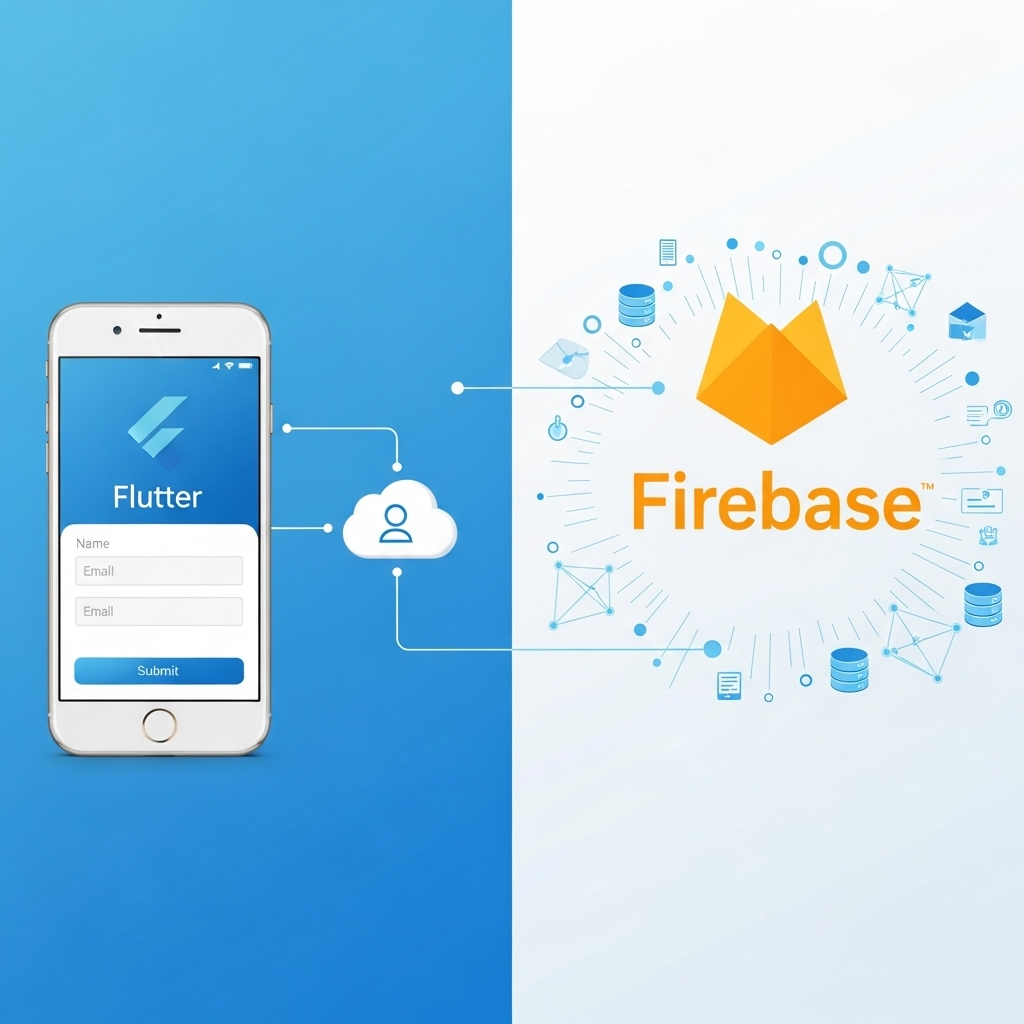
Nowadays, Firebase plays a vital role in the development of projects. There are many benefits to using the Firebase database instead of other databases. On one platform, we take multiple positive outcomes like saving our huge data, providing us opportunity of real real-time database, social logins, and mobile authentications, etc. Let’s connect our Flutter project with Firebase.
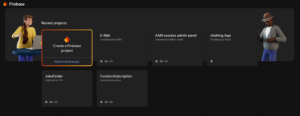
First, open the Firebase console, and click on Create a Firebase project.
Write the project name, keep in mind that letters must be small, don’t use spaces in the project name, and you can use dashes between the words.

Just click on Continue. This screen is just asking for the connection to Gemini.

Just Click on Continue. This screen is asking to add Google Analytics to your Firebase project. It helps you to show the analytics of your complete project.

On this screen, just select the default account for Firebase.

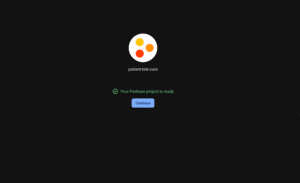
Just click on Continue, and you have successfully created a project.
Once your project has been created, you just need to connect it with your Flutter project, so click on the Flutter icon. Furthermore, you will see that we will connect our project with both Android and iOS devices.

Just click on next. This is just asking for permission to prepare your workspace.

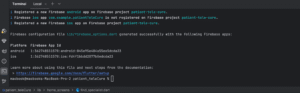
We will connect firebase with our project with the help of CLI command, This is an simplest way to create connection between the project and firebase, i have also configured CLI in my system, if you dont have, so please first install CLI and configured in your system Additionally, must be assure that login with the same email in the flutter and firebase. Now you are open to run these commands in your Flutter code terminal. Copy the First command and go to your project terminal.
Here, we just run the first command.
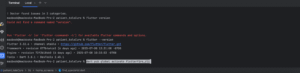
Here we run the second command.
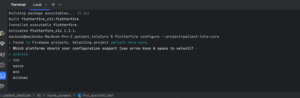
You can see that we have options to connect Firebase with multiple devices. We will select these options according to our requirements. Now, I am going to add a project with Android and iOS, but you have an option to connect with more devices like macOS, web, and Windows. Just press down and up for moving, and use the tab button to select and deselect options
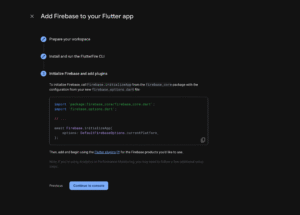
Our Firebase project has successfully connected with Firebase. Moreover, we just need to add some code in our Flutter project to complete the configuration.
We need to add these lines of code to our project. We will explore this further below.
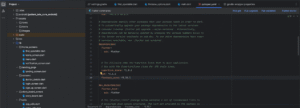
We use this code here, which we copied from the last screen. Furthermore, we need to make some small changes, like converting the main function into async, so it starts to demonstrate an error after converting the function. Now, we will install the Firebase Core package in our pubspec.YAML file.

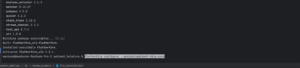
This is our pubSpec.YAML file. Here we install our project packages, and then don’t forget to pub get and pub grade.
This is our home screen of the Firebase project. You can see that we successfully showed our project.